

How Long Do Shipping Containers Last? The Complete Maintenance & Longevity Guide
Written on October 2, 2025
by Gabriel B.
In the following categories: How To
A shipping container is built to withstand one of the most punishing environments on earth: stacked six high on an ocean vessel, loaded with cargo shifting in heavy seas, exposed to salt spray, extreme heat, and freezing temperatures across repeated voyages. That structural engineering does not disappear when a container retires from freight service and ends up on your property. But how long it continues to perform depends almost entirely on what you do — and do not do — after you take ownership.
This guide covers the full lifespan picture: what to expect from each container grade, how climate affects longevity, and a system-by-system maintenance breakdown covering rust, paint, floors, doors, hinges, condensation, ventilation, and insulation. If you own a container or are about to buy one, this is the reference to keep.
Container Lifespan by Grade: What to Realistically Expect
The most important lifespan variable is the condition of the container when you buy it. Grade is an imperfect but useful shorthand for that starting condition.
| Grade | Starting Condition | Expected Lifespan (with maintenance) | Expected Lifespan (neglected) |
|---|---|---|---|
| New / One-Trip | Factory condition, one freight voyage | 25–30+ years | 15–20 years |
| IICL | Third-party inspected, high used standard | 20–25 years | 12–15 years |
| Cargo Worthy (CW) | Passed structural inspection, moderate wear | 15–20 years | 8–12 years |
| Wind & Watertight (WWT) | Keeps weather out, cosmetic wear normal | 10–15 years | 5–8 years |
| As-Is | Sold as found, condition varies widely | 5–12 years depending on condition | 2–5 years |
These are practical ranges based on real-world ownership conditions, not manufacturer specifications. A well-maintained WWT container in a dry inland climate can outlast a neglected one-trip unit in a coastal salt-air environment. Grade sets the starting point — maintenance and climate determine where you end up. For a deeper look at how grade affects both lifespan and total cost of ownership, the container grade and longevity guide works through the numbers in detail.
How Climate Shortens or Extends Container Life
Corten steel — the alloy used in ISO shipping containers — is specifically engineered to form a stable oxide layer that resists further corrosion. In dry, low-humidity environments, this passive protection works exceptionally well. In coastal, humid, or salt-air environments, the corrosion chemistry is accelerated, and the oxide layer alone is not sufficient without active coating maintenance.
| Climate Type | Corrosion Risk | Maintenance Frequency | Notes |
|---|---|---|---|
| Arid inland (AZ, NV, NM, CO) | Low | Inspect every 2–3 years | UV exposure degrades coatings; check roof and south-facing panels |
| Temperate inland (OH, IL, IN, MO) | Moderate | Inspect annually | Freeze-thaw cycles stress door seals and caulking; check spring and fall |
| Humid subtropical (FL, GA, TX Gulf, LA) | High | Inspect every 6–12 months | Condensation and surface rust most likely here; floor condition critical |
| Coastal / marine (CA coast, Northeast coast, Gulf) | Very high | Inspect every 6 months | Salt spray is the primary threat; annual recoating of vulnerable surfaces recommended |
| Cold northern (MN, ND, WY, MT) | Moderate | Inspect annually, pre-winter | Snow load on roof, ice in door seals; ground heave from freeze-thaw affects levelness |
Foundation and Placement: The Most Overlooked Longevity Factor
More containers fail from the bottom up than from the top down. Direct ground contact traps moisture against the underside of the floor framing — the steel cross-members and the wooden floor above them — creating conditions for accelerated rust and floor rot that are invisible until the damage is significant.
The minimum standard for container placement is four support points at the corner castings, on a material that does not hold water. Solid concrete blocks, railroad ties, or compacted gravel pads all work. Bare soil, grass, and packed mud do not.
- Concrete pads: The best long-term foundation. Provides firm, level, non-absorptive support at all four corners. A full perimeter pad prevents ground vegetation from growing up around the container and trapping moisture against the sides.
- Gravel bed: Effective and lower cost than concrete. Use compacted crushed stone at least 4 inches deep. Ensure the gravel pad extends slightly beyond the container footprint to direct water away from the corner areas.
- Railroad ties or timber: Adequate for most residential and short-term applications. Timber in direct ground contact will eventually rot; inspect annually and replace when soft spots develop.
- Bare soil: Not recommended. Even in dry climates, seasonal moisture cycles will accelerate underside corrosion. The cost of a gravel delivery is trivial compared to floor replacement.
Levelness matters beyond just the foundation material. A container that settles out of level — even slightly — puts stress on the door frames and corner posts. This is the leading cause of door alignment problems and is far easier to prevent at placement than to correct later.
Rust: Understanding It, Treating It, and Preventing It
Surface rust on a used shipping container is normal and expected. It is not automatically a structural problem. The difference between cosmetic rust and structural rust is depth — surface oxidation that has not penetrated the steel panel thickness is a coating issue, not a steel issue. Rust that has eaten through the panel creates holes, weakens the structure, and allows water entry that accelerates damage in adjacent areas.
Surface Rust (Cosmetic)
Appearance: Reddish-brown discoloration on exterior panels, typically appearing first on horizontal surfaces where water pools. No pitting or texture change on the steel itself.
Treatment: Wire brush or angle grinder with a wire wheel to remove loose oxidation down to bare metal or stable rust. Apply a rust-converter primer to the cleaned area — this chemically converts remaining rust into a stable compound rather than sealing over it. Topcoat with marine-grade or industrial enamel paint. For large areas, spray application is faster; for spot repairs, brush or roller is sufficient.
Pitting Rust (Early Structural Concern)
Appearance: Rust with visible surface texture change — pitting or cratering in the steel. The panel thickness is being reduced. Common on older containers at low spots in corrugated panels where water sits.
Treatment: Same as surface rust, but inspect carefully for through-holes after cleaning. Fill small pits with a two-part epoxy metal filler before priming and painting. Monitor these areas at subsequent inspections — pitting rust in the same location after treatment indicates a moisture problem that needs to be addressed at source, not just at the surface.
Through-Hole Rust (Structural Repair Required)
Appearance: Actual holes in the panel — light visible from inside when standing outside with the doors closed, or daylight visible from outside when standing inside. Water entry confirmed during rain.
Treatment: Small holes (under 2 inches) can be patched with a steel plate welded or bonded over the hole, followed by rust treatment and repainting. Larger areas of through-hole rust indicate panel replacement is more economical than extensive patch repair. This is professional welding work — improper patches create water traps that accelerate surrounding rust faster than the original hole.
The detailed rust prevention and treatment process, including product recommendations, is covered in the rust and moisture protection guide and the container maintenance and rust prevention guide.
Paint and Exterior Coating: Your Primary Defense
The factory coating on a new one-trip container is high-quality marine paint specifically formulated for the ocean freight environment. When that coating is intact, it is the primary barrier against rust. When it degrades — through UV exposure, mechanical damage, or simply age — rust follows within one to two seasons in humid or coastal environments.
Repainting Schedule by Climate
- Arid inland climates: Full repaint every 7–10 years; spot touch-up as scratches appear
- Temperate inland: Full repaint every 5–7 years; annual spot inspection and touch-up
- Humid subtropical: Full repaint every 3–5 years; semi-annual inspection
- Coastal / marine: Full repaint every 2–4 years; annual inspection minimum
Paint Selection
The right paint for a shipping container exterior is a two-system approach: a rust-inhibiting primer and a topcoat. Do not use standard house paint — it is not formulated for metal expansion and contraction and will peel within a season in temperature-cycling climates.
- Primer: Zinc-based or epoxy rust-inhibiting primer. Apply to bare metal or cleaned rust — not over intact existing paint unless the existing coat is fully adherent.
- Topcoat: Industrial enamel, alkyd enamel, or marine-grade paint. Light colors reflect heat and reduce interior temperature in hot climates — relevant if the container is used as a workspace.
The full painting process — surface preparation, primer selection, application method, and drying times — is covered step by step in the container painting guide.
Floors: The Most Commonly Damaged Component
Container floors are typically 28mm marine-grade bamboo or tropical hardwood, treated and sealed at the factory. They are designed to support forklift loads and heavy cargo — but they are vulnerable to moisture from below (foundation issues), moisture from above (internal condensation or water entry), and physical wear from heavy use over time.
Floor Inspection
Inspect the floor at least annually by walking the full length and pressing with your foot at intervals. What you are feeling for:
- Soft spots: Indicate rot or delamination. A soft spot that deflects underfoot means the structural integrity of that floor section is compromised.
- Sponginess at edges: Edge rot typically starts where the floor board meets the steel floor frame, often caused by water tracking along the wall panel from condensation.
- Discoloration from below: If you can see the underside of the floor from a crawl access point, dark staining indicates moisture history even if the surface currently feels firm.
- Smell: Musty odor inside a closed container almost always indicates moisture in the floor or wall linings.
Floor Repair vs. Replacement
Small isolated soft spots — under 12 inches in any dimension — can be repaired by cutting out the affected section and sistering in new flooring material. Full floor replacement is warranted when soft spots are widespread, when the floor has a chemical contamination history, or when converting the container for any occupied use. The floor repair and replacement guide covers material selection, subframe inspection, and the full replacement process.
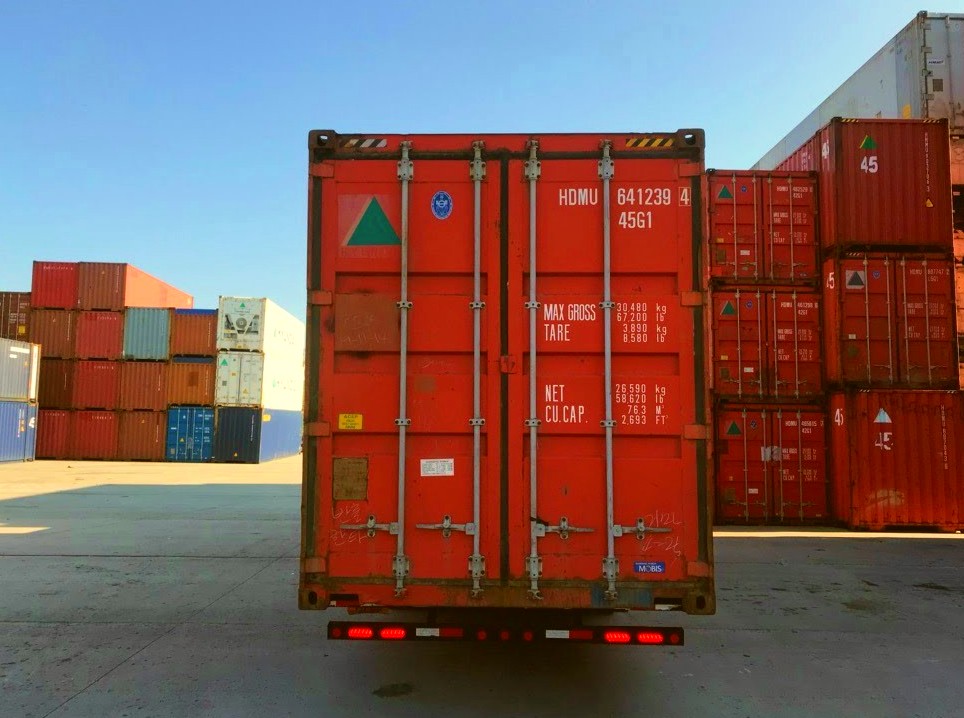
Doors: Alignment, Seals, and Hardware
Container doors are the most mechanically complex part of the structure and the most frequently problematic. They rely on precise frame alignment, intact rubber gaskets, and functioning locking cam hardware to seal the container weathertight. Any of these elements can degrade independently.
Door Alignment
Doors that are difficult to open, do not close flush, or require force to lock are almost always a symptom of something else — foundation settlement, corner post damage, or frame racking from an impact or improper lift. The door itself is rarely the root cause.
Diagnosis: Stand back from the container end and look at the door frame corners. A square frame means the door alignment issue is in the hinges or cam hardware. A frame that is visibly parallelogram-shaped — one corner higher or lower than the other — indicates structural racking that the doors cannot compensate for.
For foundation settlement: re-level the container at the corner supports. In most cases this restores door alignment without any door adjustment. For structural racking from impact: professional assessment and potentially corner post repair are required before the doors will seal correctly.
Door Seals (Gaskets)
The rubber gasket that runs around the door perimeter is the weathertight seal. It degrades through UV exposure, ozone, extreme temperature cycling, and physical compression over time. Signs of gasket failure:
- Visible cracking or brittleness in the rubber
- Light visible around the door perimeter when standing inside with doors closed
- Water entry around the door frame during rain
- Flat or deformed sections that no longer spring back when pressed
Gasket replacement is a straightforward DIY repair. Replacement gasket material is sold by the linear foot in the correct profile for standard ISO container doors. Remove the old gasket, clean the channel, and press the new gasket in. The repair takes two to four hours for a full container door set and costs $50–$150 in materials depending on container size.
Hinges and Cam Locks
Container door hinges are heavy-gauge steel welded to the door panel and door frame. They do not typically fail structurally, but they do corrode and seize in high-humidity or coastal environments. A seized hinge that is forced puts stress on the door frame and can cause misalignment over time.
Maintenance: Apply a penetrating lubricant — not WD-40, which evaporates quickly — to all hinge pins and cam lock rods twice yearly in humid climates, annually in dry climates. Marine-grade grease or lithium grease both work well. If a hinge pin is already corroded and the door is binding, soak with penetrating oil over 24 hours before forcing. Grinding out a seized hinge and welding a replacement is a professional repair but is rarely necessary with regular lubrication.
Cam lock rods — the vertical steel rods inside the door that engage the locking cams — can also seize or bend. Bent cam rods are usually caused by doors being forced when the container is racked. They can be straightened by a fabricator if the bend is minor; severe bends require rod replacement.
Condensation: The Interior Enemy
Condensation — colloquially called "container rain" — is one of the most common complaints from container owners and one of the least understood. It occurs when warm, moist air inside the container contacts the cold steel walls or ceiling and reaches the dew point, causing water droplets to form and drip onto stored contents.
It is most pronounced in climates with significant temperature swings — hot days and cool nights — and when containers hold moisture-producing contents such as cardboard boxes, fabric, or organic materials. Containers in coastal areas experience condensation more frequently due to higher ambient humidity.
Condensation Management Options
- Desiccant bags: The simplest solution for dry storage of goods sensitive to humidity. Calcium chloride desiccant bags placed inside the container absorb moisture from the air. Replace monthly or when saturated. Effective for moderate condensation in standard storage applications.
- Ventilation: Adding passive vents to the container walls allows air circulation that prevents the temperature differential from building up. Two vents — one at each end, positioned high on the wall near the roof — are the minimum for effective cross-ventilation. This is the most cost-effective permanent solution for containers in humid climates.
- Insulation: Lining the container interior with insulation eliminates the temperature differential between the interior air and the steel walls, which eliminates the dew point mechanism that causes condensation. This is the most complete solution and is covered in detail in the next section.
- Vapor barrier: A plastic vapor barrier on the interior walls reduces but does not eliminate condensation. More effective as a complement to insulation than as a standalone solution.
Ventilation: Passive and Active Options
Stock ISO containers have no ventilation — they are designed to seal cargo from the external environment. For storage applications where contents or humidity management require airflow, ventilation must be added.
Passive Vents
Louvered steel vents installed through the container wall are the standard passive ventilation solution. A pair of 6-inch louvered vents — one at each end of the container, positioned near the roof line — provides adequate cross-ventilation for most storage applications. Installation involves cutting a hole in the corrugated steel wall panel, welding or bolting the vent frame in place, and sealing the perimeter.
Vent position matters: high placement near the roof takes advantage of natural convection — warm moist air rises and exits through the high vents, drawing drier air in from below. Vents placed at mid-wall height or low on the wall are significantly less effective at managing humidity.
Active Ventilation
For containers used as workshops, offices, or any occupied space, passive ventilation is rarely sufficient. A powered exhaust fan installed at one end with a passive intake vent at the other provides positive air exchange on demand. For occupied containers in hot climates, a through-wall HVAC unit handles both climate control and ventilation simultaneously and is the standard solution for modified container offices.
Insulation: When It Matters and What to Use
Insulation serves two purposes in a shipping container: it manages interior temperature and it eliminates condensation by preventing the steel wall from reaching the dew point. For pure storage of non-temperature-sensitive goods in a dry climate, insulation is optional. For occupied spaces, workshop use, food-adjacent storage, or humid coastal environments, it is close to essential.
Insulation Methods Compared
| Method | R-Value | Condensation Control | Cost (20ft) | Best For |
|---|---|---|---|---|
| Closed-cell spray foam | R-6 to R-7 per inch | Excellent — adheres to steel, no air gap | $1,500–$3,000 installed | Offices, homes, humid climates |
| Rigid foam board (XPS/polyiso) | R-5 to R-6 per inch | Good with vapor barrier | $600–$1,200 DIY | Workshops, moderate climates |
| Fiberglass batt (framed wall) | R-3.5 per inch | Poor alone — needs vapor barrier | $400–$900 DIY | Dry climates only; requires interior framing |
| Mineral wool / Rockwool | R-4 per inch | Moderate | $500–$1,100 DIY | Fire-resistant applications, workshops |
Closed-cell spray foam is the gold standard for container insulation because it adheres directly to the steel surface — eliminating the air gap between insulation and wall that allows condensation to form. It also adds structural rigidity. The tradeoff is cost and the requirement for professional application.
For DIY applications, rigid foam board cut to fit between the corrugated wall ribs and adhered with construction adhesive is the most practical approach. Follow with a vapor barrier and interior finish (plywood paneling is common) if the space will be occupied.
Roof Maintenance
The roof is the highest-risk surface for water entry and the most commonly neglected. Water pools in the corrugated channels, accelerating rust at the low points. Any dent that creates a deeper pool accelerates this further.
Annual roof inspection should check for:
- Standing water after rain — indicates a low spot from denting or uneven placement
- Rust at the low points of corrugations, particularly toward the center of the roof span
- Failed caulking around any fittings, vents, or previous patches
- Soft spots when walked — press carefully across the roof surface; deflection indicates weakened steel
Minor dents that create water pools can be filled with a two-part metal filler and painted over. Larger dents that have compromised the panel thickness require welded plate repair. Caulking failures around fittings are a simple sealant replacement — use a polyurethane or marine-grade silicone sealant rated for metal and UV exposure.
Roof coating products — rubberized coatings applied over the entire roof surface — are an effective preventive treatment for containers in wet climates. They create a waterproof membrane over the entire roof and fill micro-cracks in existing paint before they become rust entry points. Application is a roller-on DIY job and needs to be reapplied every 5–10 years depending on the product and climate.
Maintenance Schedule: Annual Checklist
The following checklist covers the full container inspection and maintenance cycle. For most climates, annual inspection is the minimum. For coastal or humid subtropical locations, do this every six months.
- Foundation: Check all four support points for settlement or shifting; confirm container is still level; look for vegetation growth against the container base
- Exterior panels: Walk all four sides; mark any new rust spots, dents with paint cracking, or scratches through to bare metal for treatment
- Roof: Check for water pooling, caulking failure around fittings, and soft spots
- Floor: Walk the full interior pressing for soft spots; check edges and corners for moisture-related softness
- Doors: Open and close both doors; confirm they seal flush, latch smoothly, and lock without excessive force
- Door gaskets: Press the rubber gasket at intervals around the full perimeter; replace any sections that are cracked, flat, or no longer spring back
- Hinges and cam locks: Lubricate all hinge pins and cam lock rods; check for binding or unusual resistance
- Vents (if installed): Confirm louvers open and close freely; check vent frame sealing for gaps
- Interior walls: Look for rust streaks indicating water entry points; note any condensation staining
- Rust treatment: Wire brush and treat any bare metal or pitting rust found during inspection; touch up with primer and paint before the next rain season
When to Repair vs. When to Replace
Most container problems are worth repairing if caught early. The calculus changes when repair costs approach or exceed replacement value, or when structural integrity is compromised beyond what surface repair can address.
| Issue | Repair Cost (approx.) | Verdict |
|---|---|---|
| Door gasket replacement | $50–$150 | Always repair |
| Surface rust treatment and touch-up | $100–$400 | Always repair |
| Full exterior repaint | $500–$1,500 | Repair if container is otherwise sound |
| Floor section repair (isolated) | $200–$600 | Repair |
| Full floor replacement | $800–$1,800 | Repair if structure is sound; replace if combined with other major issues |
| Panel patch (small through-hole) | $300–$700 | Repair |
| Corner post structural repair | $500–$1,500+ | Assess replacement cost first; may favor replacing WWT/as-is unit |
| Multiple through-holes, severe floor rot, racked frame | $2,000+ | Replace — total repair cost likely exceeds used container replacement value |
Browse Replacement and Upgrade Inventory
If your current container has reached the end of its economical repair life, or if you are buying your first unit with longevity as a priority, YES Containers stocks new one-trip and quality used units across depot locations nationwide.
View the full catalog at yescontainers.com/products or call 1-800-223-4755 to speak with someone about your specific requirements.
Frequently Asked Questions
How long does a shipping container last without any maintenance?
It depends heavily on climate and starting grade. A new one-trip container placed on firm ground in a dry inland climate might show only minor cosmetic rust after 10–15 years without maintenance. The same container in a coastal environment could develop structural rust issues within 5–8 years without regular coating maintenance. Used containers in poor-maintenance conditions in humid climates can become structurally compromised in as few as 3–5 years.
What is the single most important maintenance task?
Foundation and placement comes first — it is the most common cause of accelerated failure and the easiest to get right at the start. After that, maintaining the exterior coating (paint) is the highest-leverage ongoing maintenance task because it prevents the rust that causes every other problem downstream.
Does insulation affect container lifespan?
Yes, indirectly. Insulation eliminates condensation by preventing the steel surface from reaching the dew point. This reduces interior rust, protects the floor from moisture exposure, and extends the life of stored contents. In humid coastal climates, insulation is one of the best longevity investments for a container that will be used long-term.
How do I stop my container doors from sticking?
First check whether the container is level — even a small foundation shift can rack the frame enough to bind the doors. If levelness is confirmed, lubricate all hinge pins and cam lock rods with a marine-grade grease. If the door gasket has hardened and is creating drag, replace the gasket sections that are no longer pliable. If the door frame itself is visibly deformed, that is a structural issue requiring assessment beyond lubrication.
Can I extend a container's life indefinitely with good maintenance?
Practically, yes — within limits. The structural steel of a well-maintained container can last 50+ years. The components that have finite service lives are the wooden floor (which can be replaced), the door gaskets (replaceable), and the exterior coating (renewable). There is no inherent reason a properly maintained container cannot serve for decades beyond the typical lifespan ranges — those ranges assume average rather than excellent maintenance.